Slackコミュニティに
無料で参加する
Flutterラボの
プレミアム会員になる
【Flutter】Columnで画面範囲を超えてしまったときの解決方法
2020.10.13
Columnを使っていると、画面範囲を超えてしまうことでエラーが出てしまうことがあります。
BOTTOM OVERFLOWED BY *** PIXELS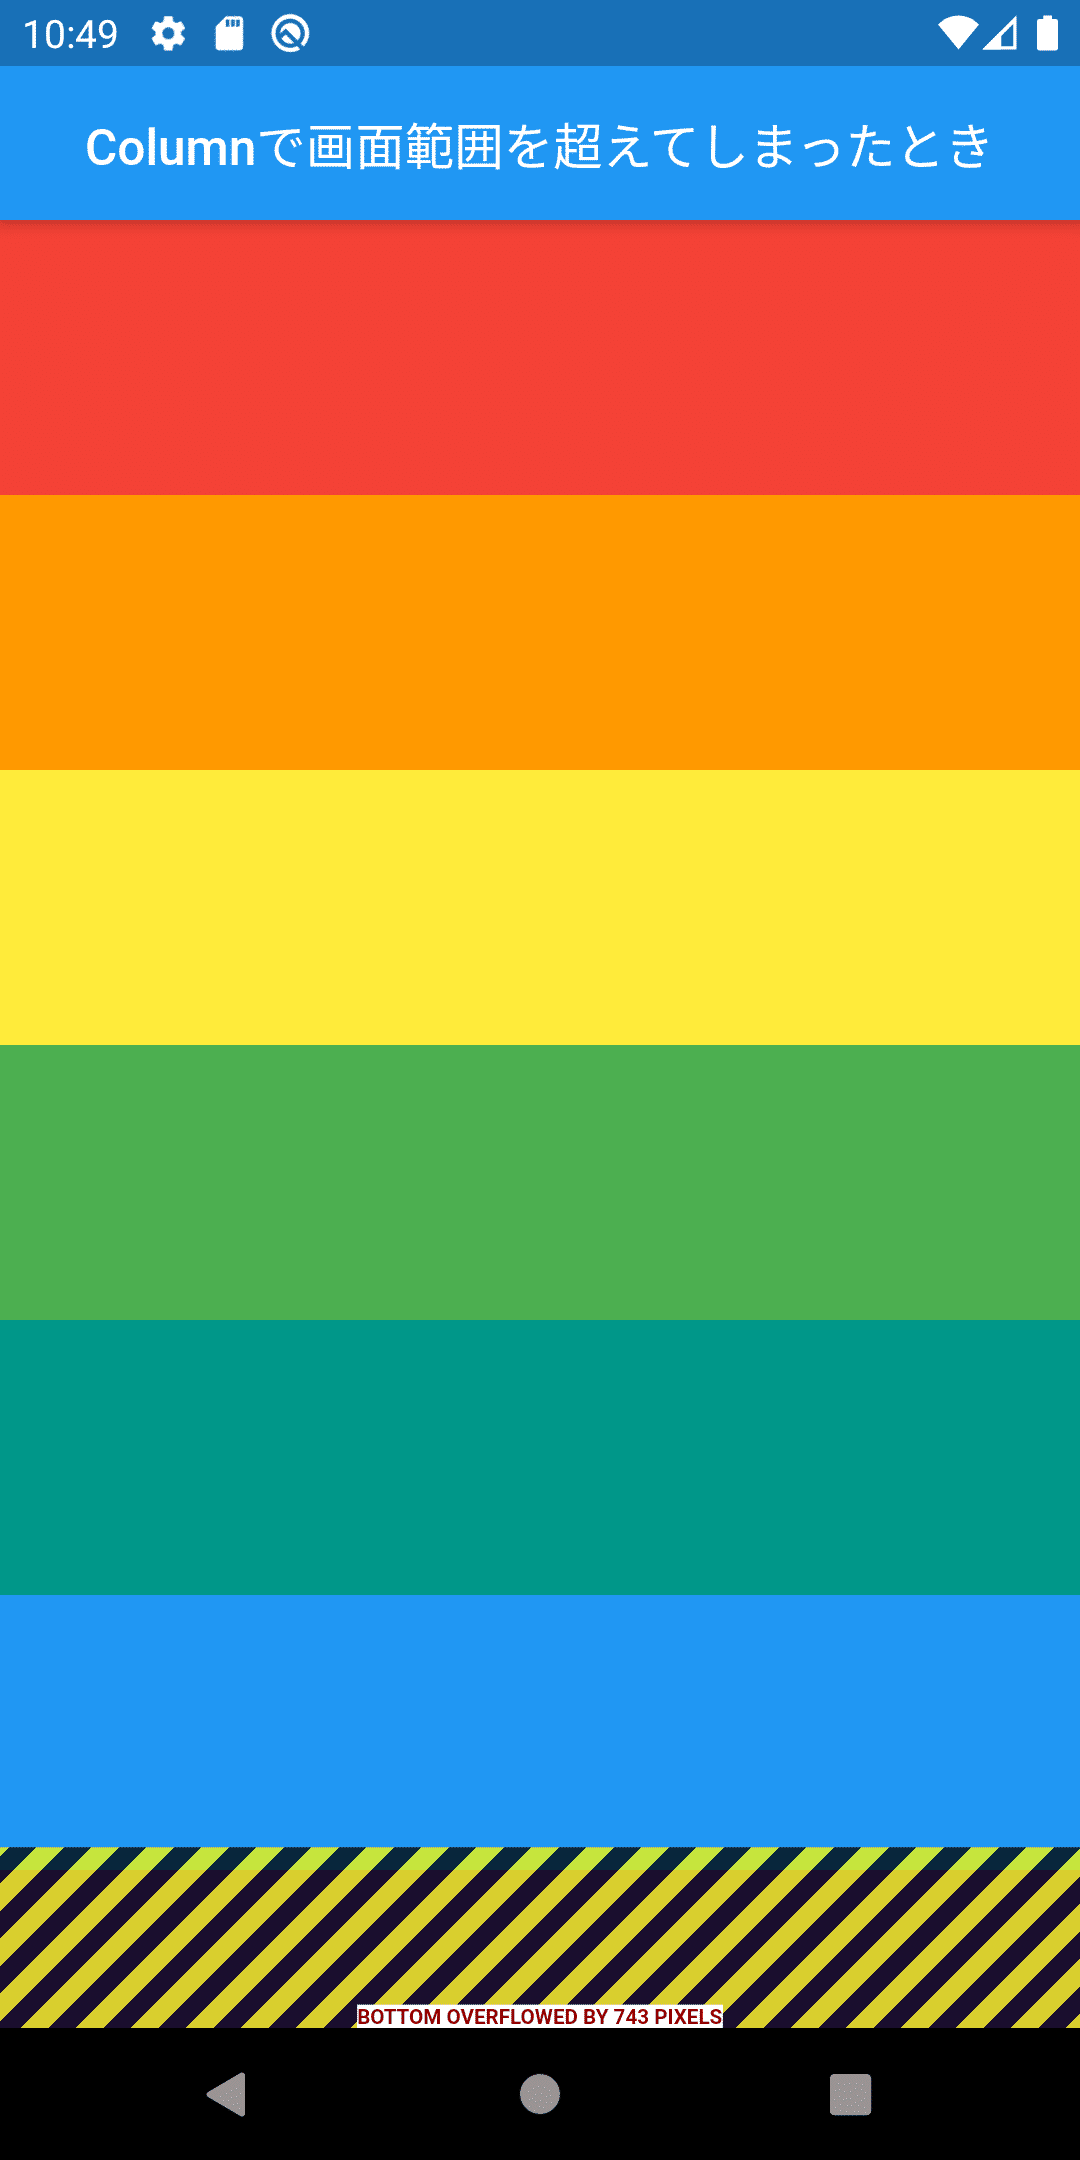
こういった場合は、スクロールできるウィジェットを使う必要があります。
今回は、ListViewを使う方法と、SingleChildScrollViewを使う方法、2種類を紹介します。
もとのエラーの出るコードは以下のようになっています。
@override
Widget build(BuildContext context) {
 return Scaffold(
   appBar: AppBar(
     title: Text('Columnで画面範囲を超えてしまったとき', style: TextStyle(fontSize: 18),),
     centerTitle: true,
   ),
   body: Column(
     children: [
       Container(height: 100, color: Colors.red,),
       Container(height: 100, color: Colors.orange,),
       Container(height: 100, color: Colors.yellow,),
       Container(height: 100, color: Colors.green,),
       Container(height: 100, color: Colors.teal,),
       Container(height: 100, color: Colors.blue,),
       Container(height: 100, color: Colors.deepPurple,),
     ],
   )
 );
}
ListView を使う
ColumnをListViewに書き換えます。
@override
Widget build(BuildContext context) {
 return Scaffold(
   appBar: AppBar(
     title: Text('Columnで画面範囲を超えてしまったとき', style: TextStyle(fontSize: 18),),
     centerTitle: true,
   ),
   body: ListView(
     children: [
       Container(height: 100, color: Colors.red,),
       Container(height: 100, color: Colors.orange,),
       Container(height: 100, color: Colors.yellow,),
       Container(height: 100, color: Colors.green,),
       Container(height: 100, color: Colors.teal,),
       Container(height: 100, color: Colors.blue,),
       Container(height: 100, color: Colors.deepPurple,),
       Container(height: 100, color: Colors.red,),
       Container(height: 100, color: Colors.orange,),
       Container(height: 100, color: Colors.yellow,),
       Container(height: 100, color: Colors.green,),
       Container(height: 100, color: Colors.teal,),
       Container(height: 100, color: Colors.blue,),
       Container(height: 100, color: Colors.deepPurple,),
     ],
   )
 );
}
これで解決と言いたいところですが、以下のGIF動画のように、スクロールさせる必要がないときも画面を引っ張ったときの動作が表示されてしまいます。
こういうときに、通常通りのColumnと同じ挙動にしたい場合、SingleChildScrollViewを使います。
SingleChildScrollView を使う
ColumnをSingleChildScrollViewで囲います。
これで、画面幅を超えないときは、Columnだけのときと同じ挙動になります。
@override
Widget build(BuildContext context) {
 return Scaffold(
   appBar: AppBar(
     title: Text('Columnで画面範囲を超えてしまったとき', style: TextStyle(fontSize: 18),),
     centerTitle: true,
   ),
   body: SingleChildScrollView(
     child: Column(
       children: [
         Container(height: 100, color: Colors.red,),
         Container(height: 100, color: Colors.orange,),
         Container(height: 100, color: Colors.yellow,),
         Container(height: 100, color: Colors.green,),
         Container(height: 100, color: Colors.teal,),
         Container(height: 100, color: Colors.blue,),
         Container(height: 100, color: Colors.deepPurple,),
       ],
     ),
   )
 );
}
逆に、SingleChildScrollViewを使うと、画面を引っ張ったときの動作がないので、『引っ張って更新』のようなことができなくなります。
引っ張って更新の詳しい実装方法もまとめているので参考にしてみてください。
まとめ
ListViewは、常にスクロールできるウィジェットとなるため、APIやDBから取得した情報のようにデータ数が増減するようなものを表示するときに使いやすい。
SingleChildScrollViewは、画面範囲を超えない場合はColumnと同じようにスクロールできないウィジェットとなるため、アプリの設定ページやログイン画面など、ウィジェット数が確定しているときに使いやすい。

【Dart】Stringからint, double, DateTimeに変換する
2020.09.14
【Dart】【Flutter】List型(リスト)の使い方とよく使うメソッドまとめ
2020.09.18
【Dart】【Flutter】DateTime型についてのまとめ
2020.10.01
【Dart】Map型の使い方とよく使うメソッドまとめ
2020.09.13