Slackコミュニティに
無料で参加する
Flutterラボの
プレミアム会員になる
【Flutter】#4アプリ開発ドキュメンタリー
2021.11.03
10/10からYouTubeライブ新企画『アプリ開発ドキュメンタリー』を開始しました。毎週日曜日にライブ配信内で、新規プロジェクト作成からリリースまですべてライブで公開します。ただ開発をするのではなく、コードの解説を交えながら進めていきますので是非ご覧いただければと思います!
↓前回(#3)の内容
#4で開発した内容
今回は、線の太さを変更し、さらにその情報を端末保存できるように改善しました。
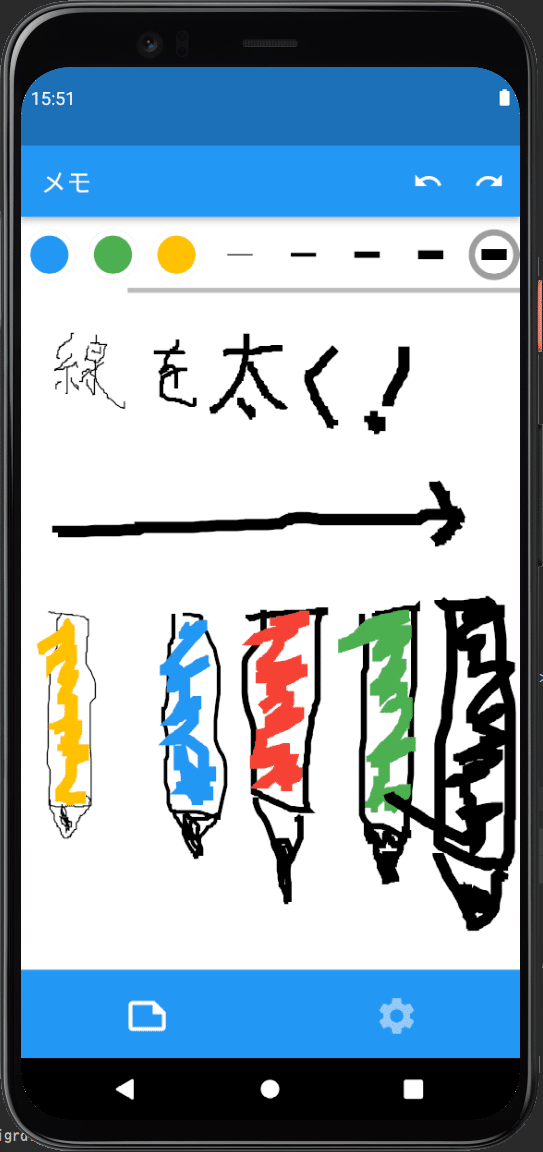
線の太さを選択するためのUIを実装
Row(
 children: [1, 3, 5, 7, 9].map((e) {
   return GestureDetector(
     child: Padding(
       padding: const EdgeInsets.only(left: 10),
       child: Container(
         decoration: BoxDecoration(
             shape: BoxShape.circle,
             color: Colors.transparent,
             border: Border.all(color: SharedPrefs.getStrokeWidth() == e ? Colors.grey : Colors.white, width: 5)
         ),
         child: AspectRatio(
           aspectRatio: 1,
           child: Padding(
             padding: const EdgeInsets.symmetric(horizontal: 5),
             child: Divider(
               height: 0,
               thickness: e.toDouble(),
               color: Colors.black,
             ),
           )
         ),
       ),
     ),
     onTap: () async {
       await SharedPrefs.setStrokeWidth(e);
       setState(() {});
     },
   );
 }).toList(),
),
SharedPreference(端末保存用)
class SharedPrefs {
 static SharedPreferences? _sharedPreferences;

 static final String _color = 'color';
 //今回追加
 static final String _strokeWidth = 'strokeWidth';

 static Future<void> setInstance() async {
   if(_sharedPreferences == null) {
     _sharedPreferences = await SharedPreferences.getInstance();
   }
 }

 static Map<ColorType, Color> colorMap = {
   ColorType.black: Colors.black,
   ColorType.red: Colors.red,
   ColorType.blue: Colors.blue,
   ColorType.green: Colors.green,
   ColorType.yellow: Colors.amber,
 };

 static Color convertColorTypeToColor(ColorType colorType) {
   return colorMap[colorType] ?? Colors.black;
 }

 static Color getColor() {
   return colorMap[ColorType.values.firstWhere((element) => element.toString() == _sharedPreferences!.getString(_color), orElse: () => ColorType.black)] ?? Colors.black;
 }
 static Future<bool> setColor(ColorType value){
   return _sharedPreferences!.setString(_color, value.toString());
 }

 //今回追加
 static int getStrokeWidth() => _sharedPreferences!.getInt(_strokeWidth) ?? 5;
 static Future<bool> setStrokeWidth(int value) => _sharedPreferences!.setInt(_strokeWidth, value);
}
Paintインスタンスの生成箇所(strokeWidthで線の太さを決定)
Paint paint = Paint()
   ..color = SharedPrefs.getColor()
   ..style = PaintingStyle.stroke
   //線の太さ
   ..strokeWidth = SharedPrefs.getStrokeWidth().toDouble();
まとめ
今回は、線の太さを変更できる機能を実装しました。次回はホワイトボード上に描かれた絵を、端末保存できるようにしたいと思います。それではまたお会いしましょう!
Flutterラボ
hatchoutschool
アプリ開発ドキュメンタリー
Flutterを使ったアプリ開発を毎週日曜日にYouTubeライブで配信しています。
新規プロジェクト作成からリリースまですべてライブで公開します。
ただ開発をするのではなく、コードの解説を交えながら進めていきます。
noteでは、ライブで記述したコードと、内容を抜粋してご紹介します。
FlutterラボYouTubeチャンネル
https://www.youtube.com/channel/UCrzA_ub-JcI_8daABLfOg-g (4本)

【Dart】Stringからint, double, DateTimeに変換する
2020.09.14

【Dart】【Flutter】List型(リスト)の使い方とよく使うメソッドまとめ
2020.09.18

【Dart】【Flutter】DateTime型についてのまとめ
2020.10.01

【Dart】Map型の使い方とよく使うメソッドまとめ
2020.09.13